United States

Top 5 Things to Do in New River Gorge

Are you looking for the ultimate adventure opportunity in the Appalachian Mountains in one of the most underrated destinations in the country? Welcome to New River Gorge National Park and Preserve, the newest National Park in the United States, and home to one of the oldest rivers in the world (despite its misleading name).

New River Gorge is located in wild and wonderful West Virginia, and is home to some of the most unexpected landscapes on the eastern side of the country. When you picture West Virginia, you might not picture rushing class five rapids, towering sandstone cliffs, and a multitude of waterfalls and wildlife, but you’ll find all of that and more in New River Gorge National Park.

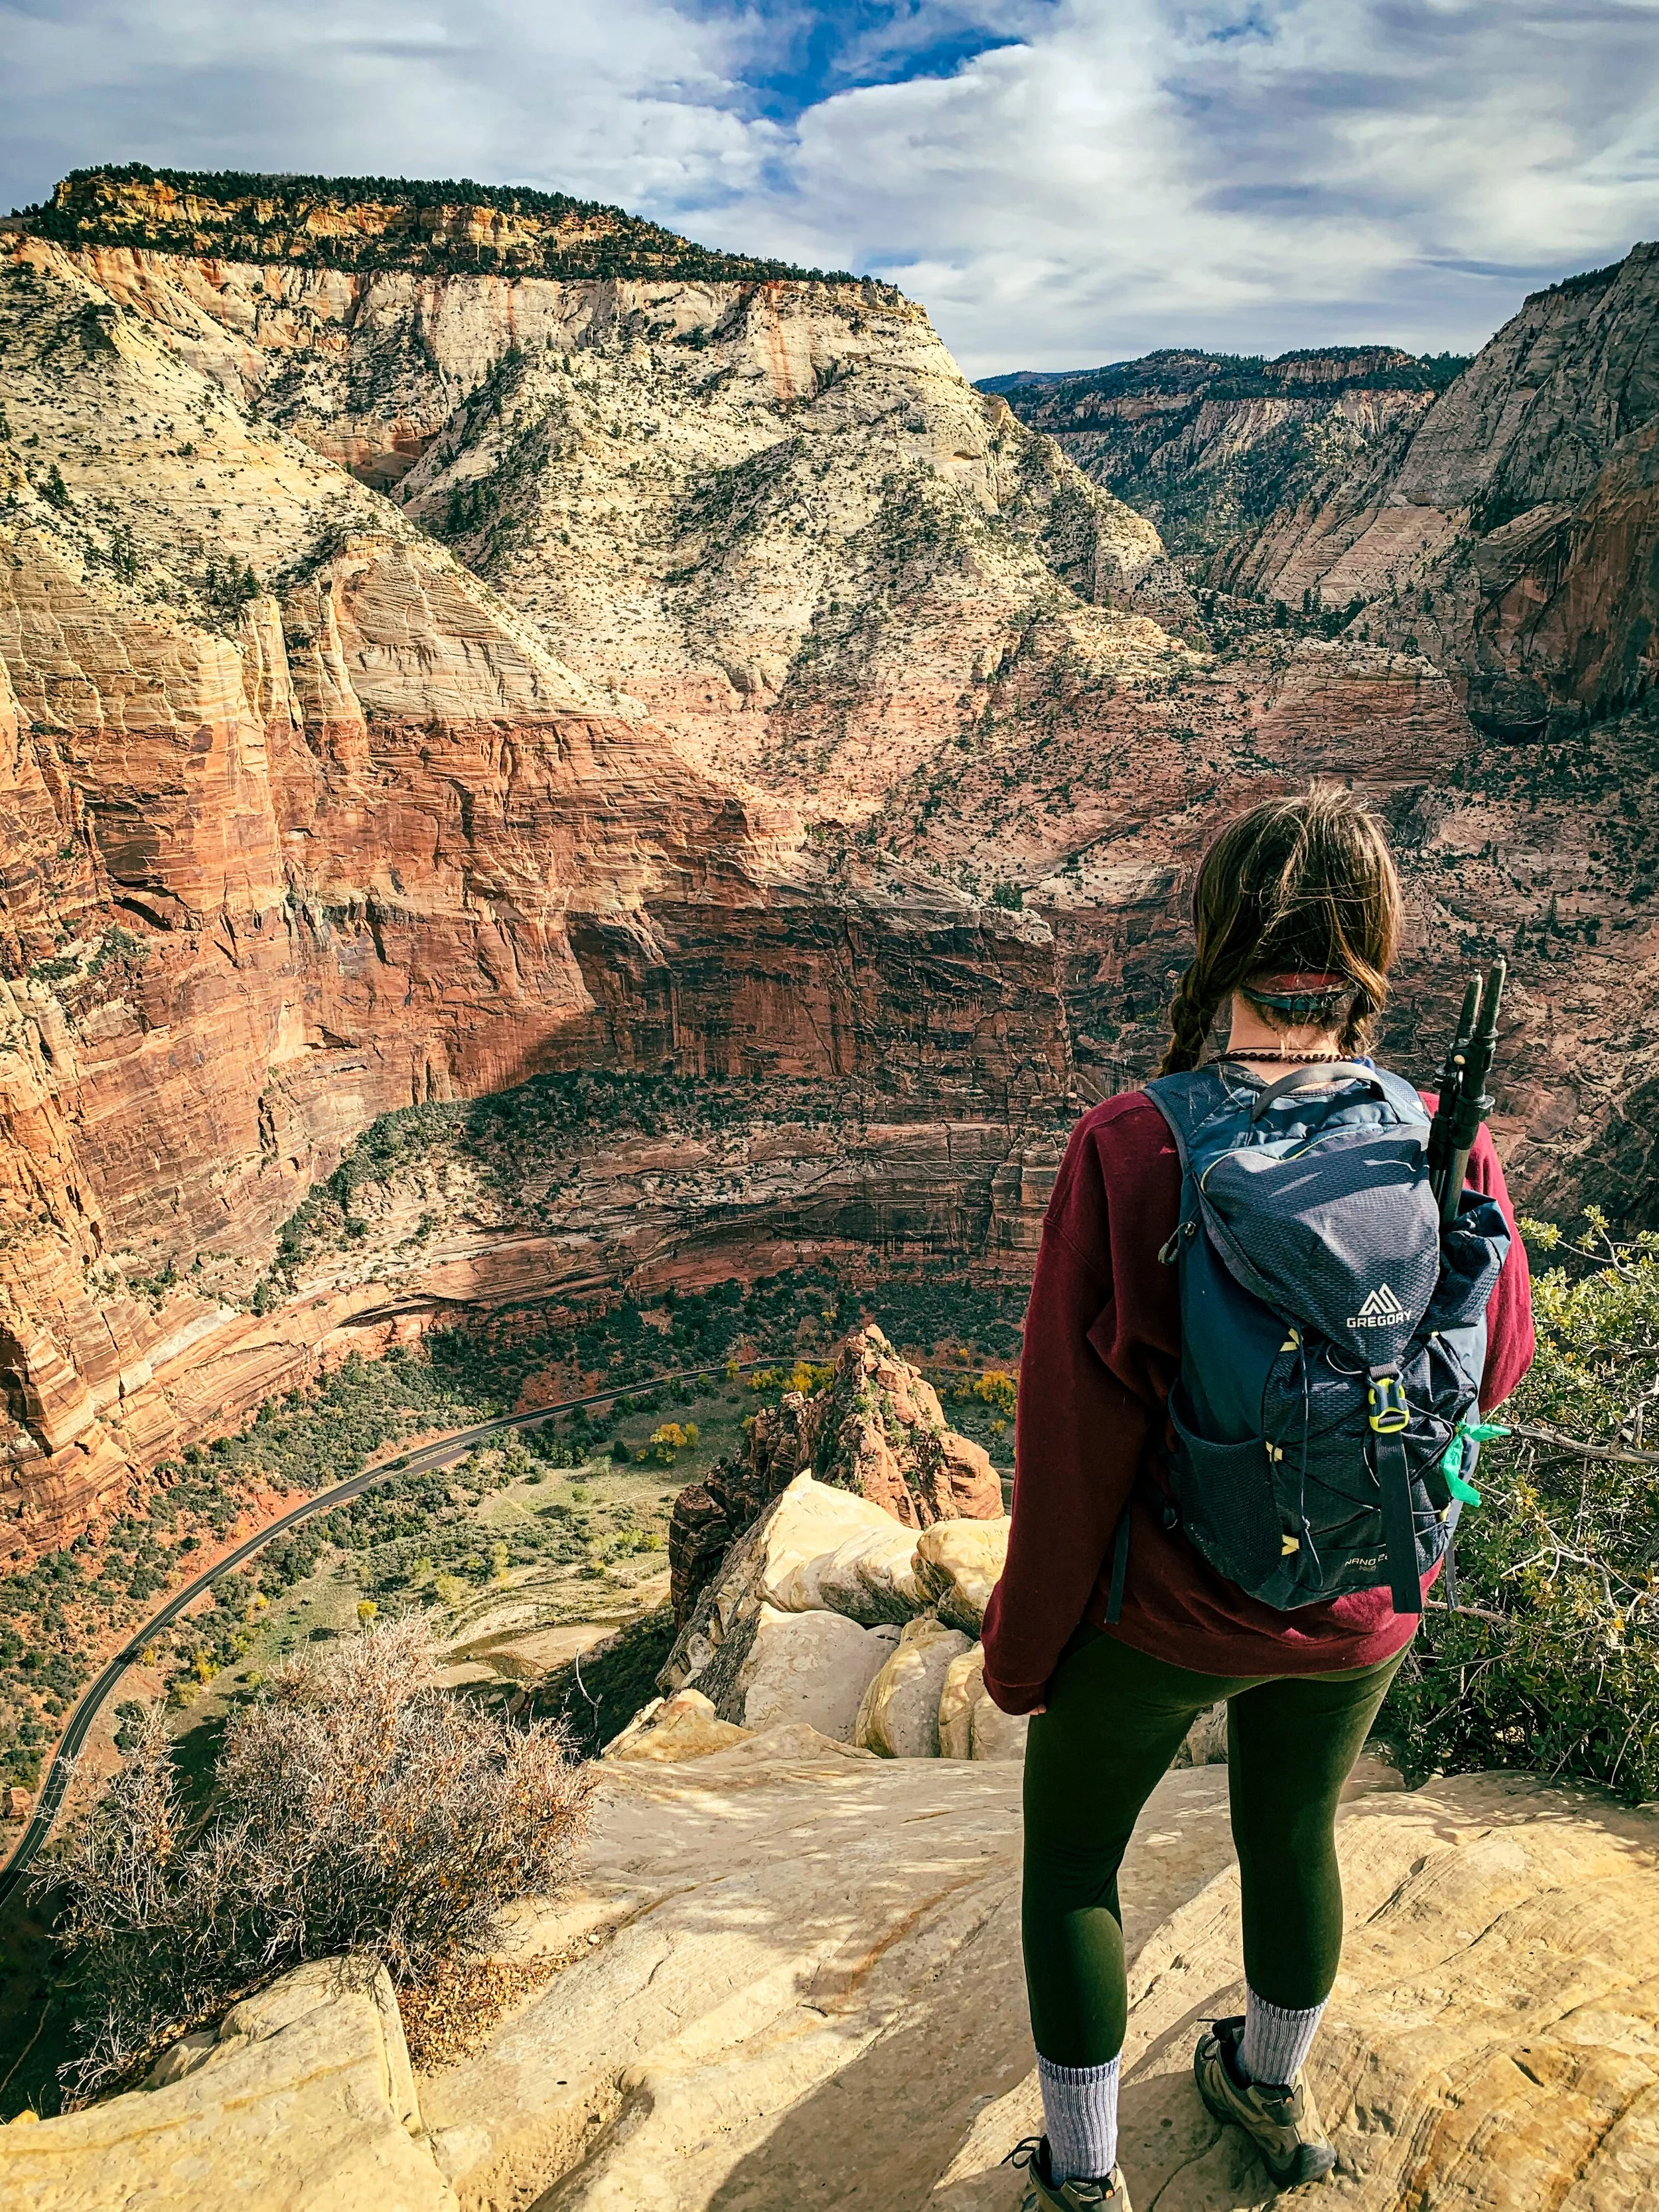
I had the privilege of working as an Assistant Climbing Guide in the park during the summer of 2022, which means I got to spend all of my free time climbing, exploring, and enjoying unexpectedly wild West Virginia. Here are the top 5 things you should make sure you do during your trip to New River Gorge.

Know Before You Go

There are a couple things you should know ahead of your visit to New River Gorge National Park and Preserve. This is all my advice for navigating this park for the first time.

The weather in New River Gorge is unpredictable. Always assume it’s going to rain even if the weather isn’t calling for it. This is considered a rainforest, and showers can come quickly and come down hard. That being said though, summer is absolutely the wet season when it comes to rain. If you’re a rock climber looking for the driest time of the year to visit, we call Fall “send season” for a reason.

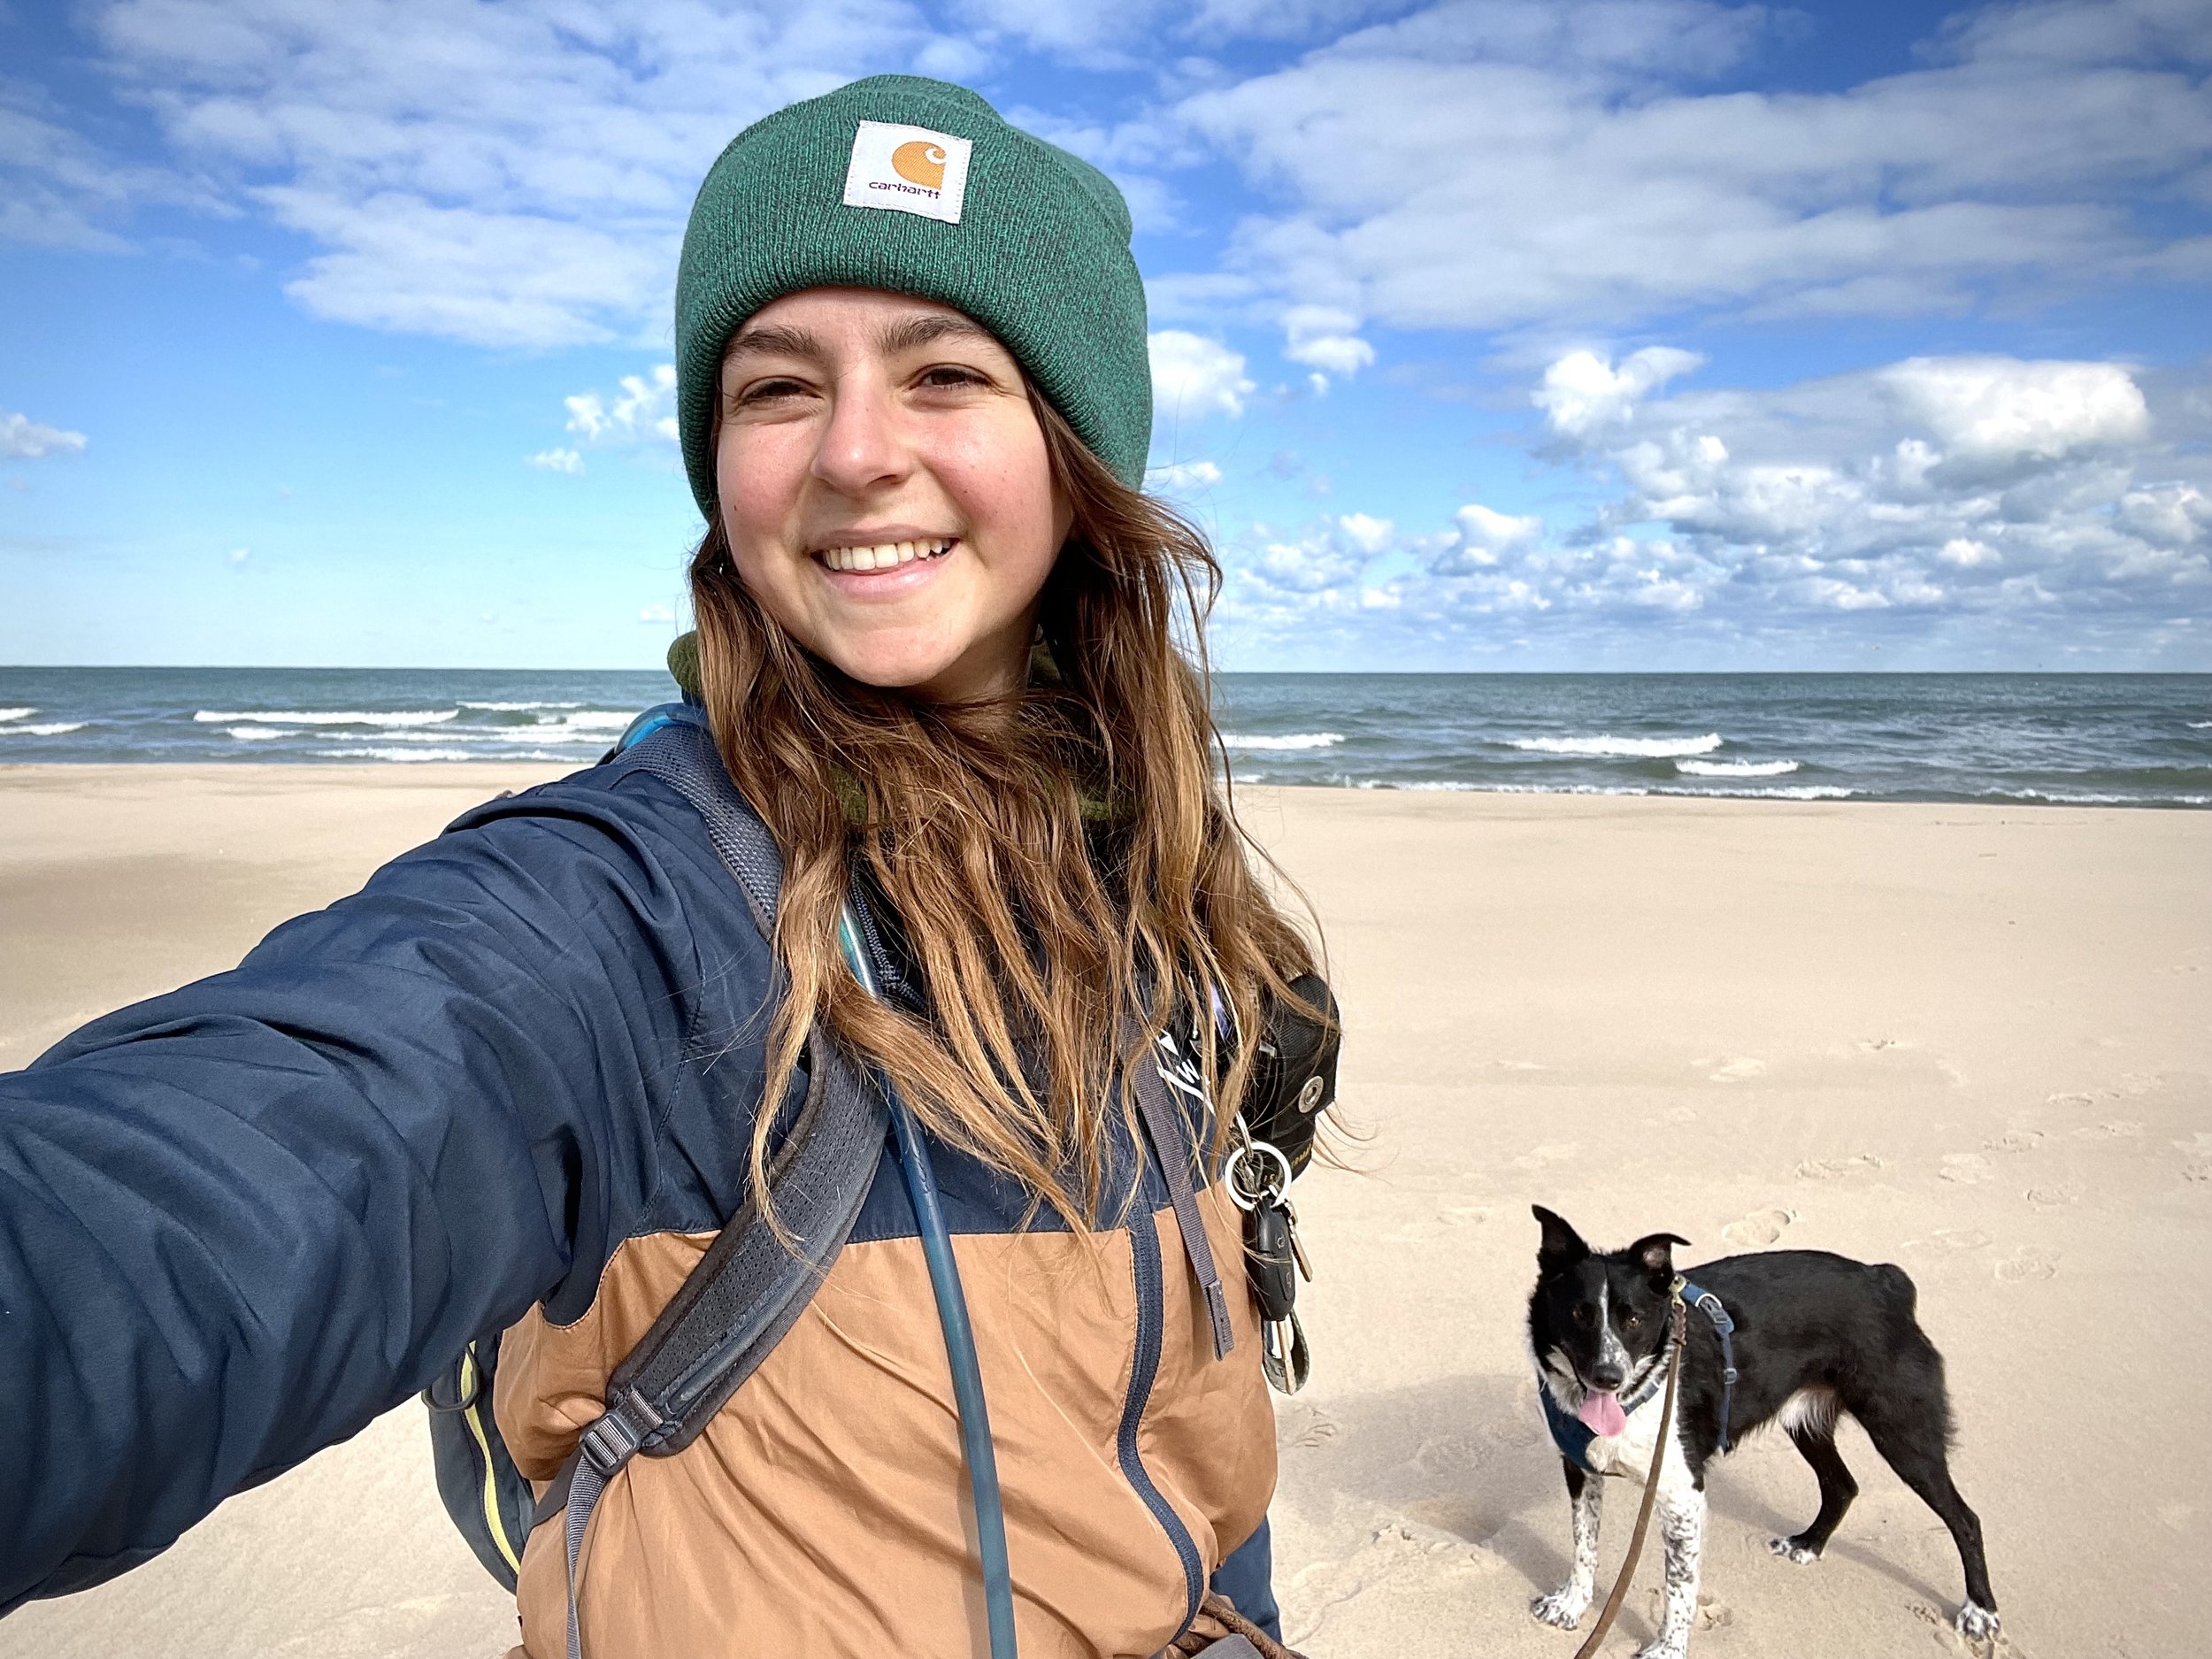
Dogs are allowed pretty much everywhere in New River Gorge as long as they’re kept on a leash. Feel free to bring well behaved dogs with you on trails, to the crag, or to picnic areas, and always make sure you have an extra poop bag on you so we can keep our wild spaces wild.

New River Gorge is not your classic National Park where you’ll enter through an entrance station and be within the park the rest of your time. New River Gorge is a park that’s interspersed with neighborhoods, Highway 19, and the adorable town of Fayetteville. The official National Park boundaries are the quarter mile of space surrounding the New River itself. Everything else is still considered “The Gorge” though, and is just as worth checking out while you’re there.

Go Whitewater Rafting

Since New River Gorge National Park is known for the New River, you can’t skip out on going whitewater rafting during your time here. You’ll want to book a trip with one of the local outfitters and the most popular company to raft with is Ace Adventure Resort, although you can’t go wrong with any company that’s going to get you safely on the water.

If you’re traveling with children, you’ll want to keep in mind that there are some age restrictions on the river. If you have young children, you’ll probably want to look into rafting the Upper New River, which only goes up to Class III rapids. Teenagers love the Lower New River, which goes up to Class V. Some companies even offer all day trips that will include time to swim in the river, lunch, and an overall longer adventure.

If you’re visiting in the fall and have a party of people over 16 years old, you might consider the biggest adventure available in the New River Gorge area: rafting the Gauley River. This rafting trip includes some of the most intense Class V rapids in the country (possibly even the world). While this river isn’t within New River Gorge National Park boundaries, it is part of the Gauley River National Recreation Area, also managed by the NPS. The Lower Gauley is slightly less intense if you’re not sure about embarking on the ultimate Upper Gauley adventure.

Rafting on the Lower New just before Fayette Station

Go Hiking

There are lots of hiking trails available in New River Gorge National Park and they all lead to somewhere beautiful. You can pick up a trail guide in the visitor center, but these are some of the most popular trails for finding the best views in the park.

(trail classifications and ratings are my own, based on the available terrain in the area)

Endless Wall Trail

Endless Wall is easily the most famous view in the park. Here, you’ll eventually reach Diamond Point Overlook, where you’ll gain views of some of the rapids and rafters below. This trail is dog friendly, and there are two parking lots. I recommend parking at the first one you’ll pass as you come from Highway 19. You’ll have the opportunity to make the trail a loop by hiking parking lot to parking lot, and if you park at the first lot, the section of this loop that will have to be along the road will be downhill rather than up (unless that’s your thing!).

Endless Wall is about 3 miles round trip, and I would classify this hike as easy.

Long Point Trail

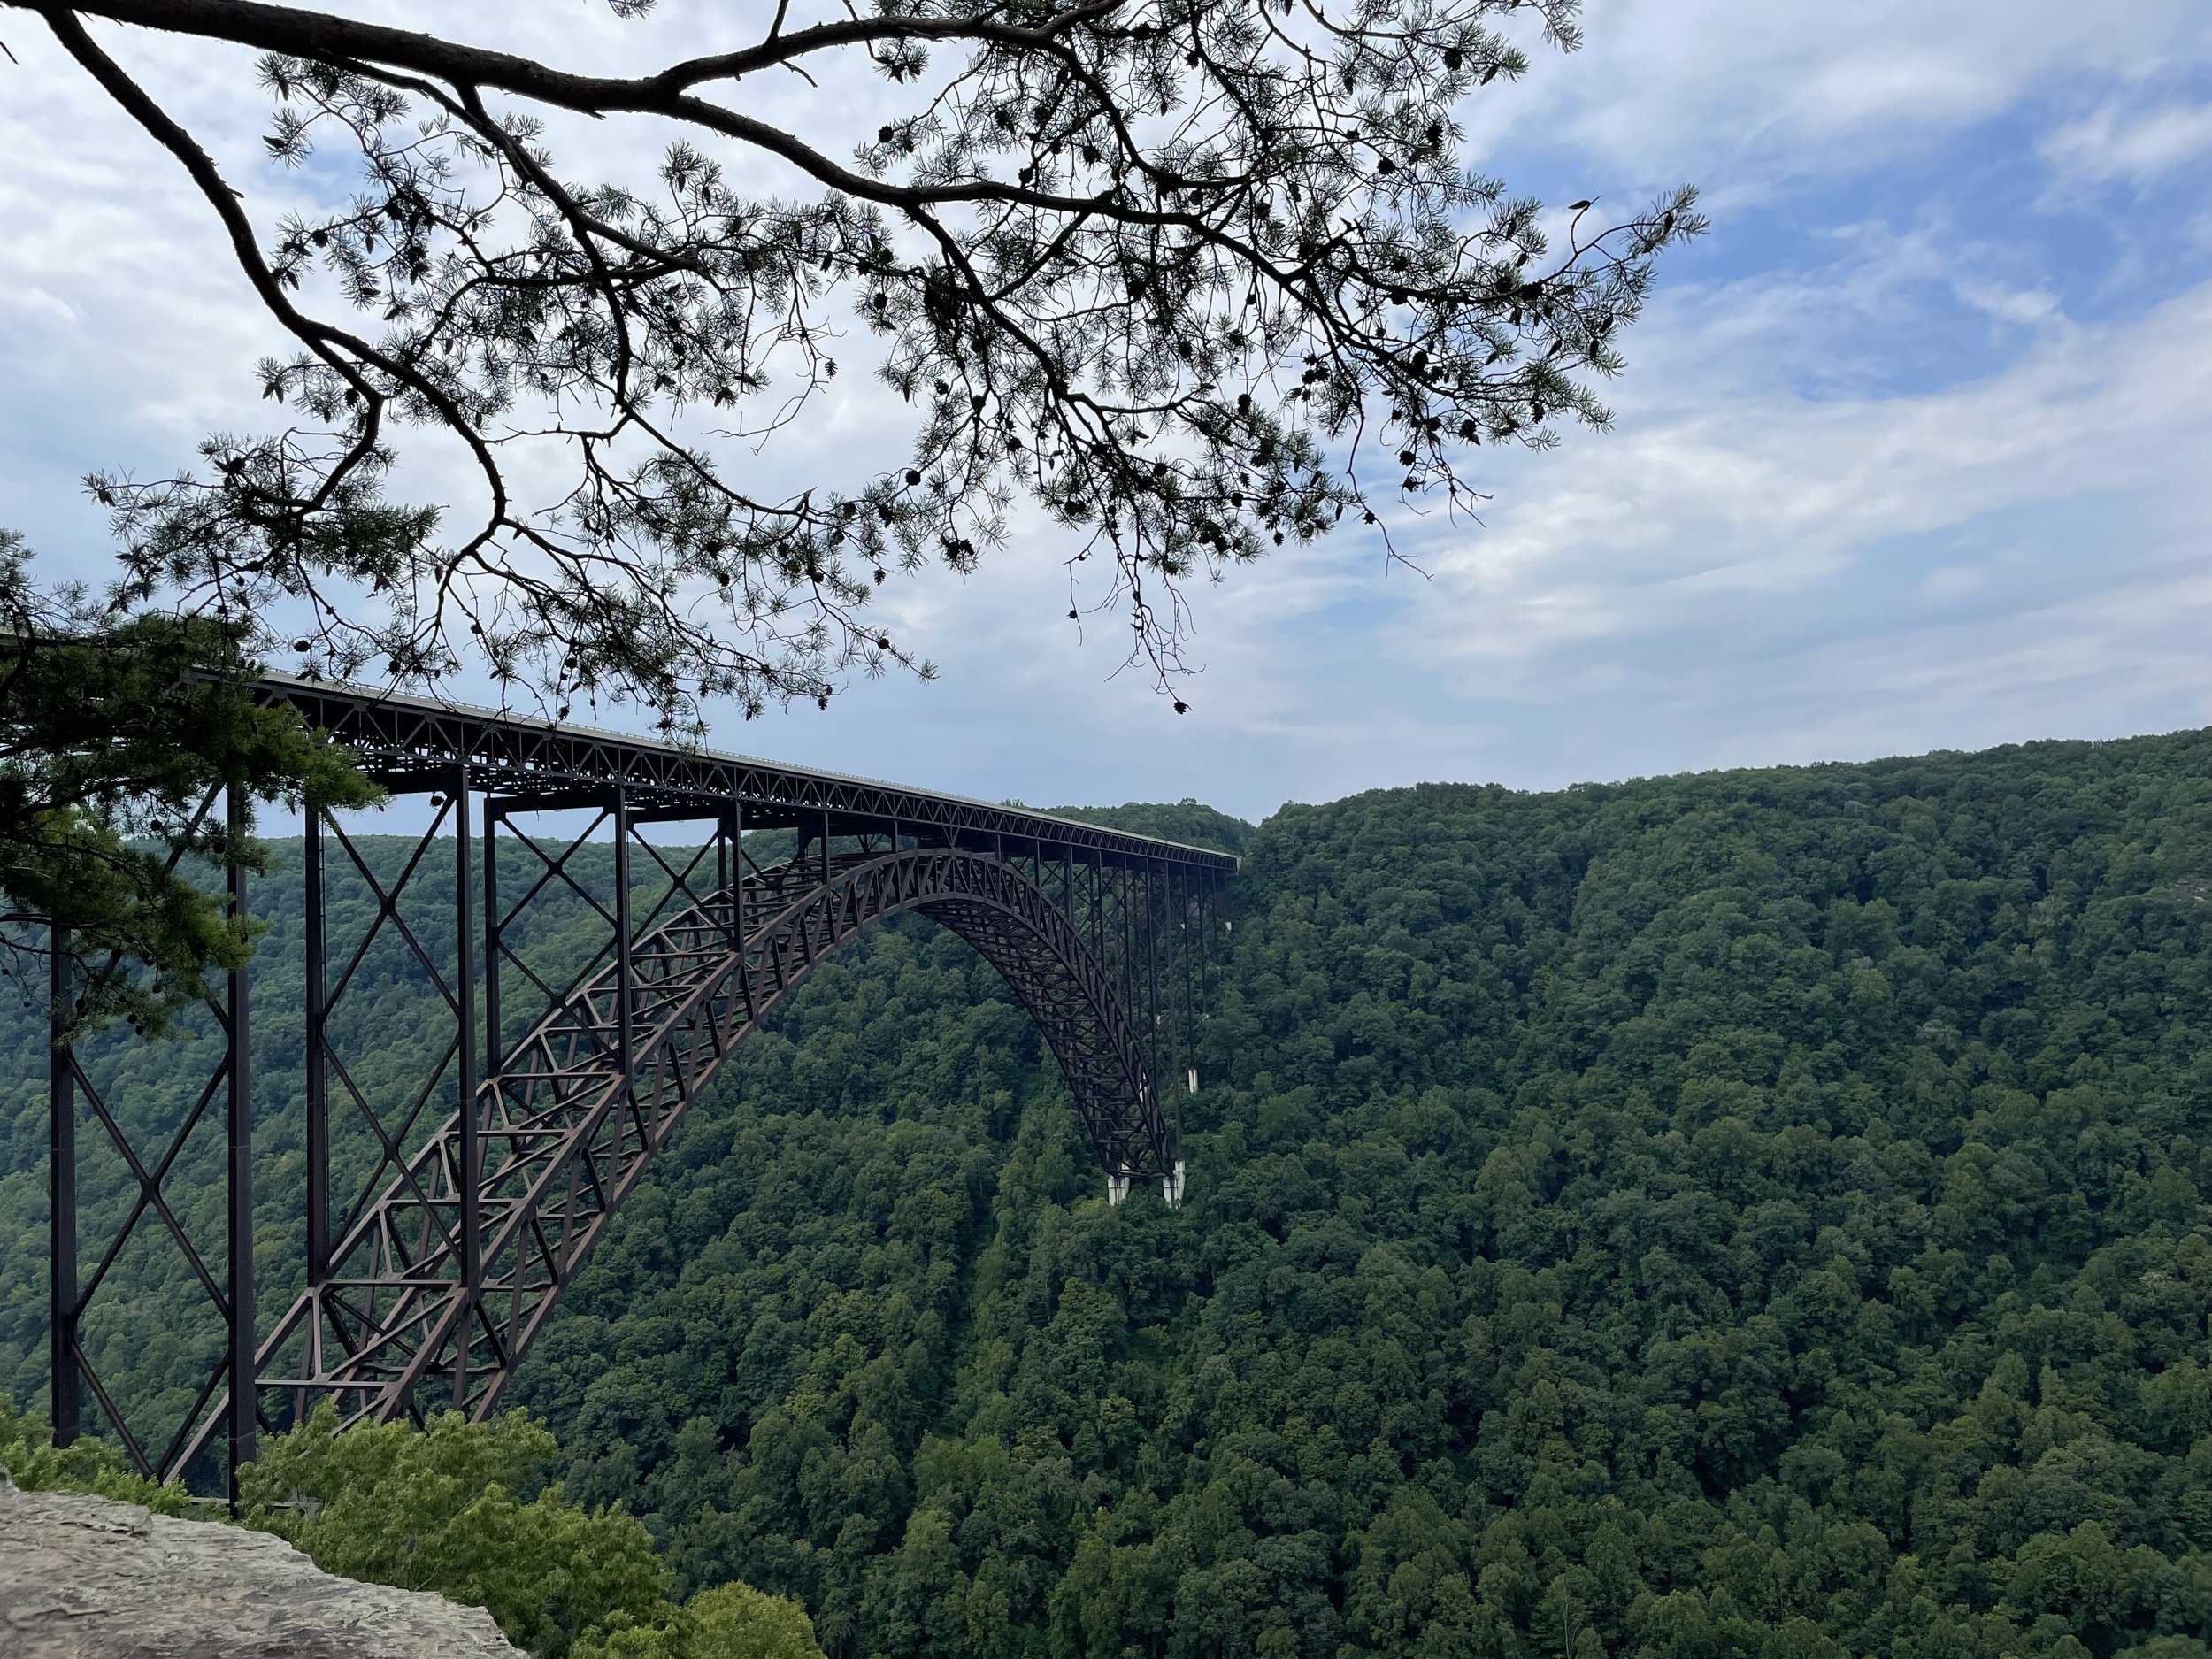
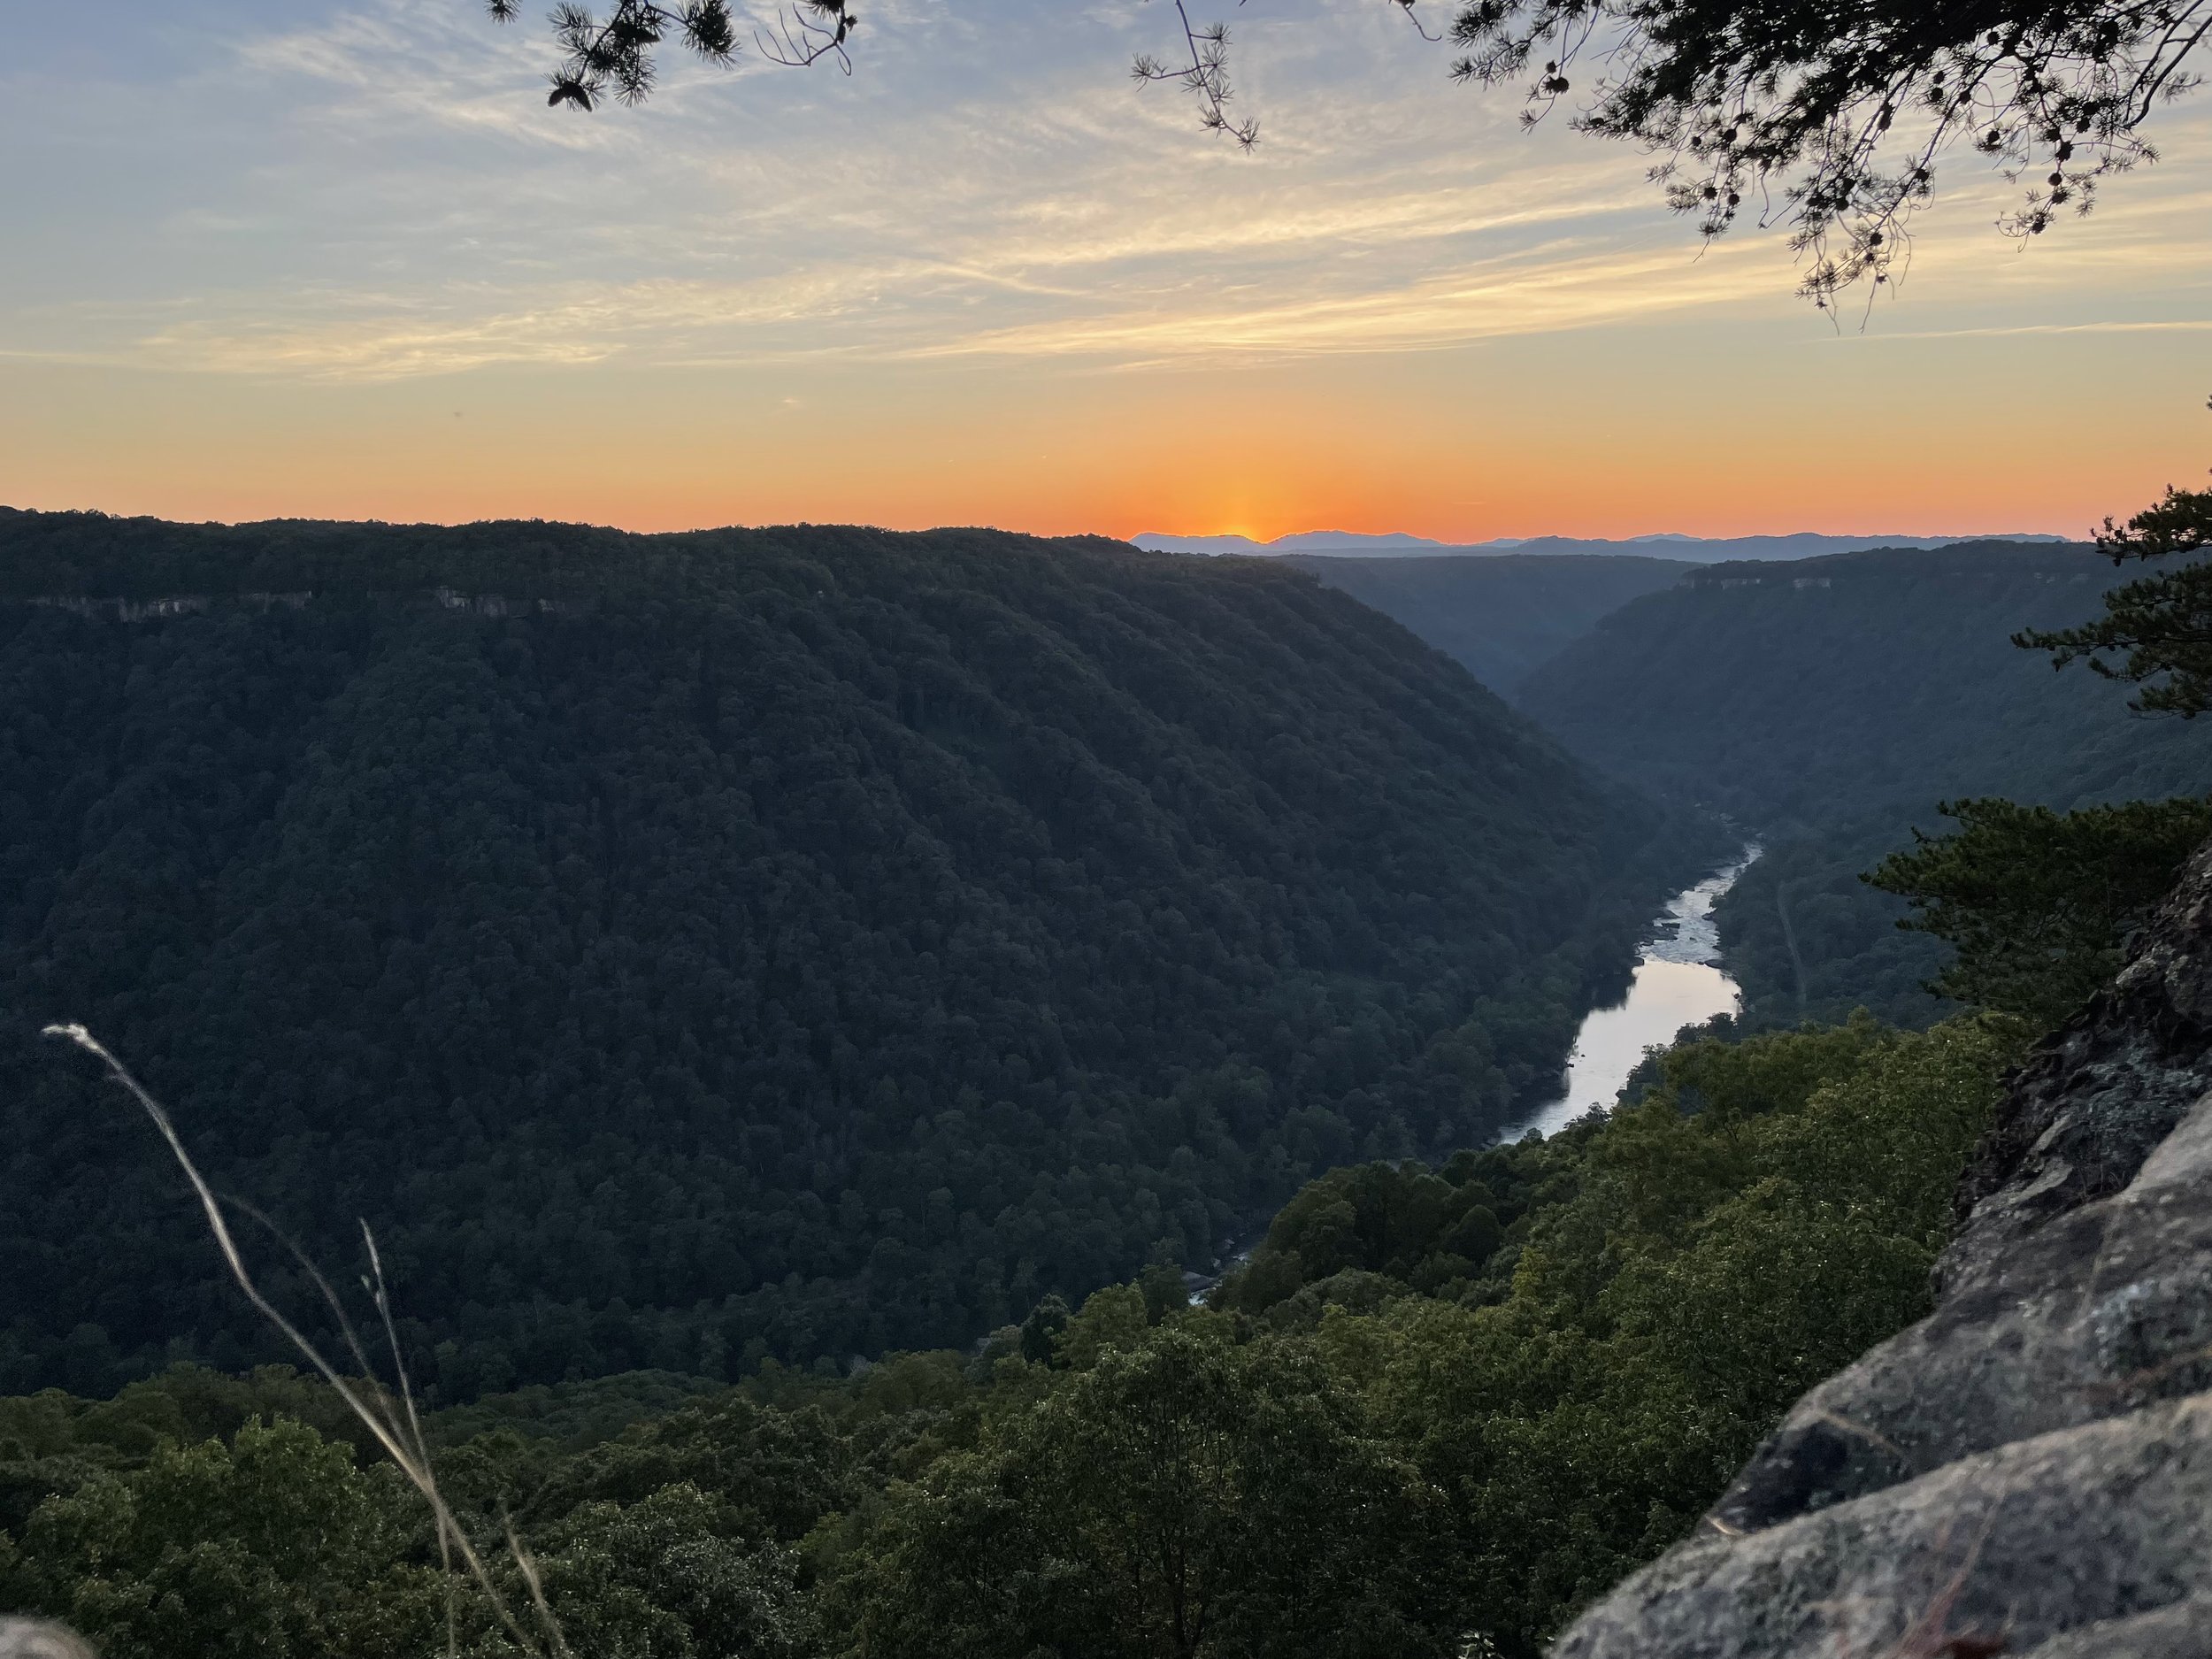
Long Point is the other trail where you’ll gain some million dollar views of the park. Here, you’ll gain views of the famous New River Gorge Bridge and this is one of the best places to catch the sunset in the park. The trail starts off fairly flat and then starts to gain some elevation and rocks on the path toward the viewpoint.

Long point is about three miles round trip, and I would classify it as moderate.

Glade Creek to Kates Falls

Glade Creek is easily my favorite trail in the park, but it doesn’t lead to some incredible viewpoint. Instead, you’ll hike deep into the forest, along the rushing Glade Creek, to the stunning Kates Falls. This trail is fairly flat but long, so be prepared for at least a half day on trail with no cell signal. I recommend parking at the Lower Glade Creek Trailhead as the Upper Trailhead lot is 4x4 access only. Hiking to the falls from the Lower Glade Creek lot is about 9.2 miles one way, and I would classify this trail as difficult. Make sure you keep an eye out for the sign to Kates Falls on the left once you’re about a mile and a half from the bridge, and prepare for flooded trails and creek crossings—trekking sandals would be a great choice for this trail!
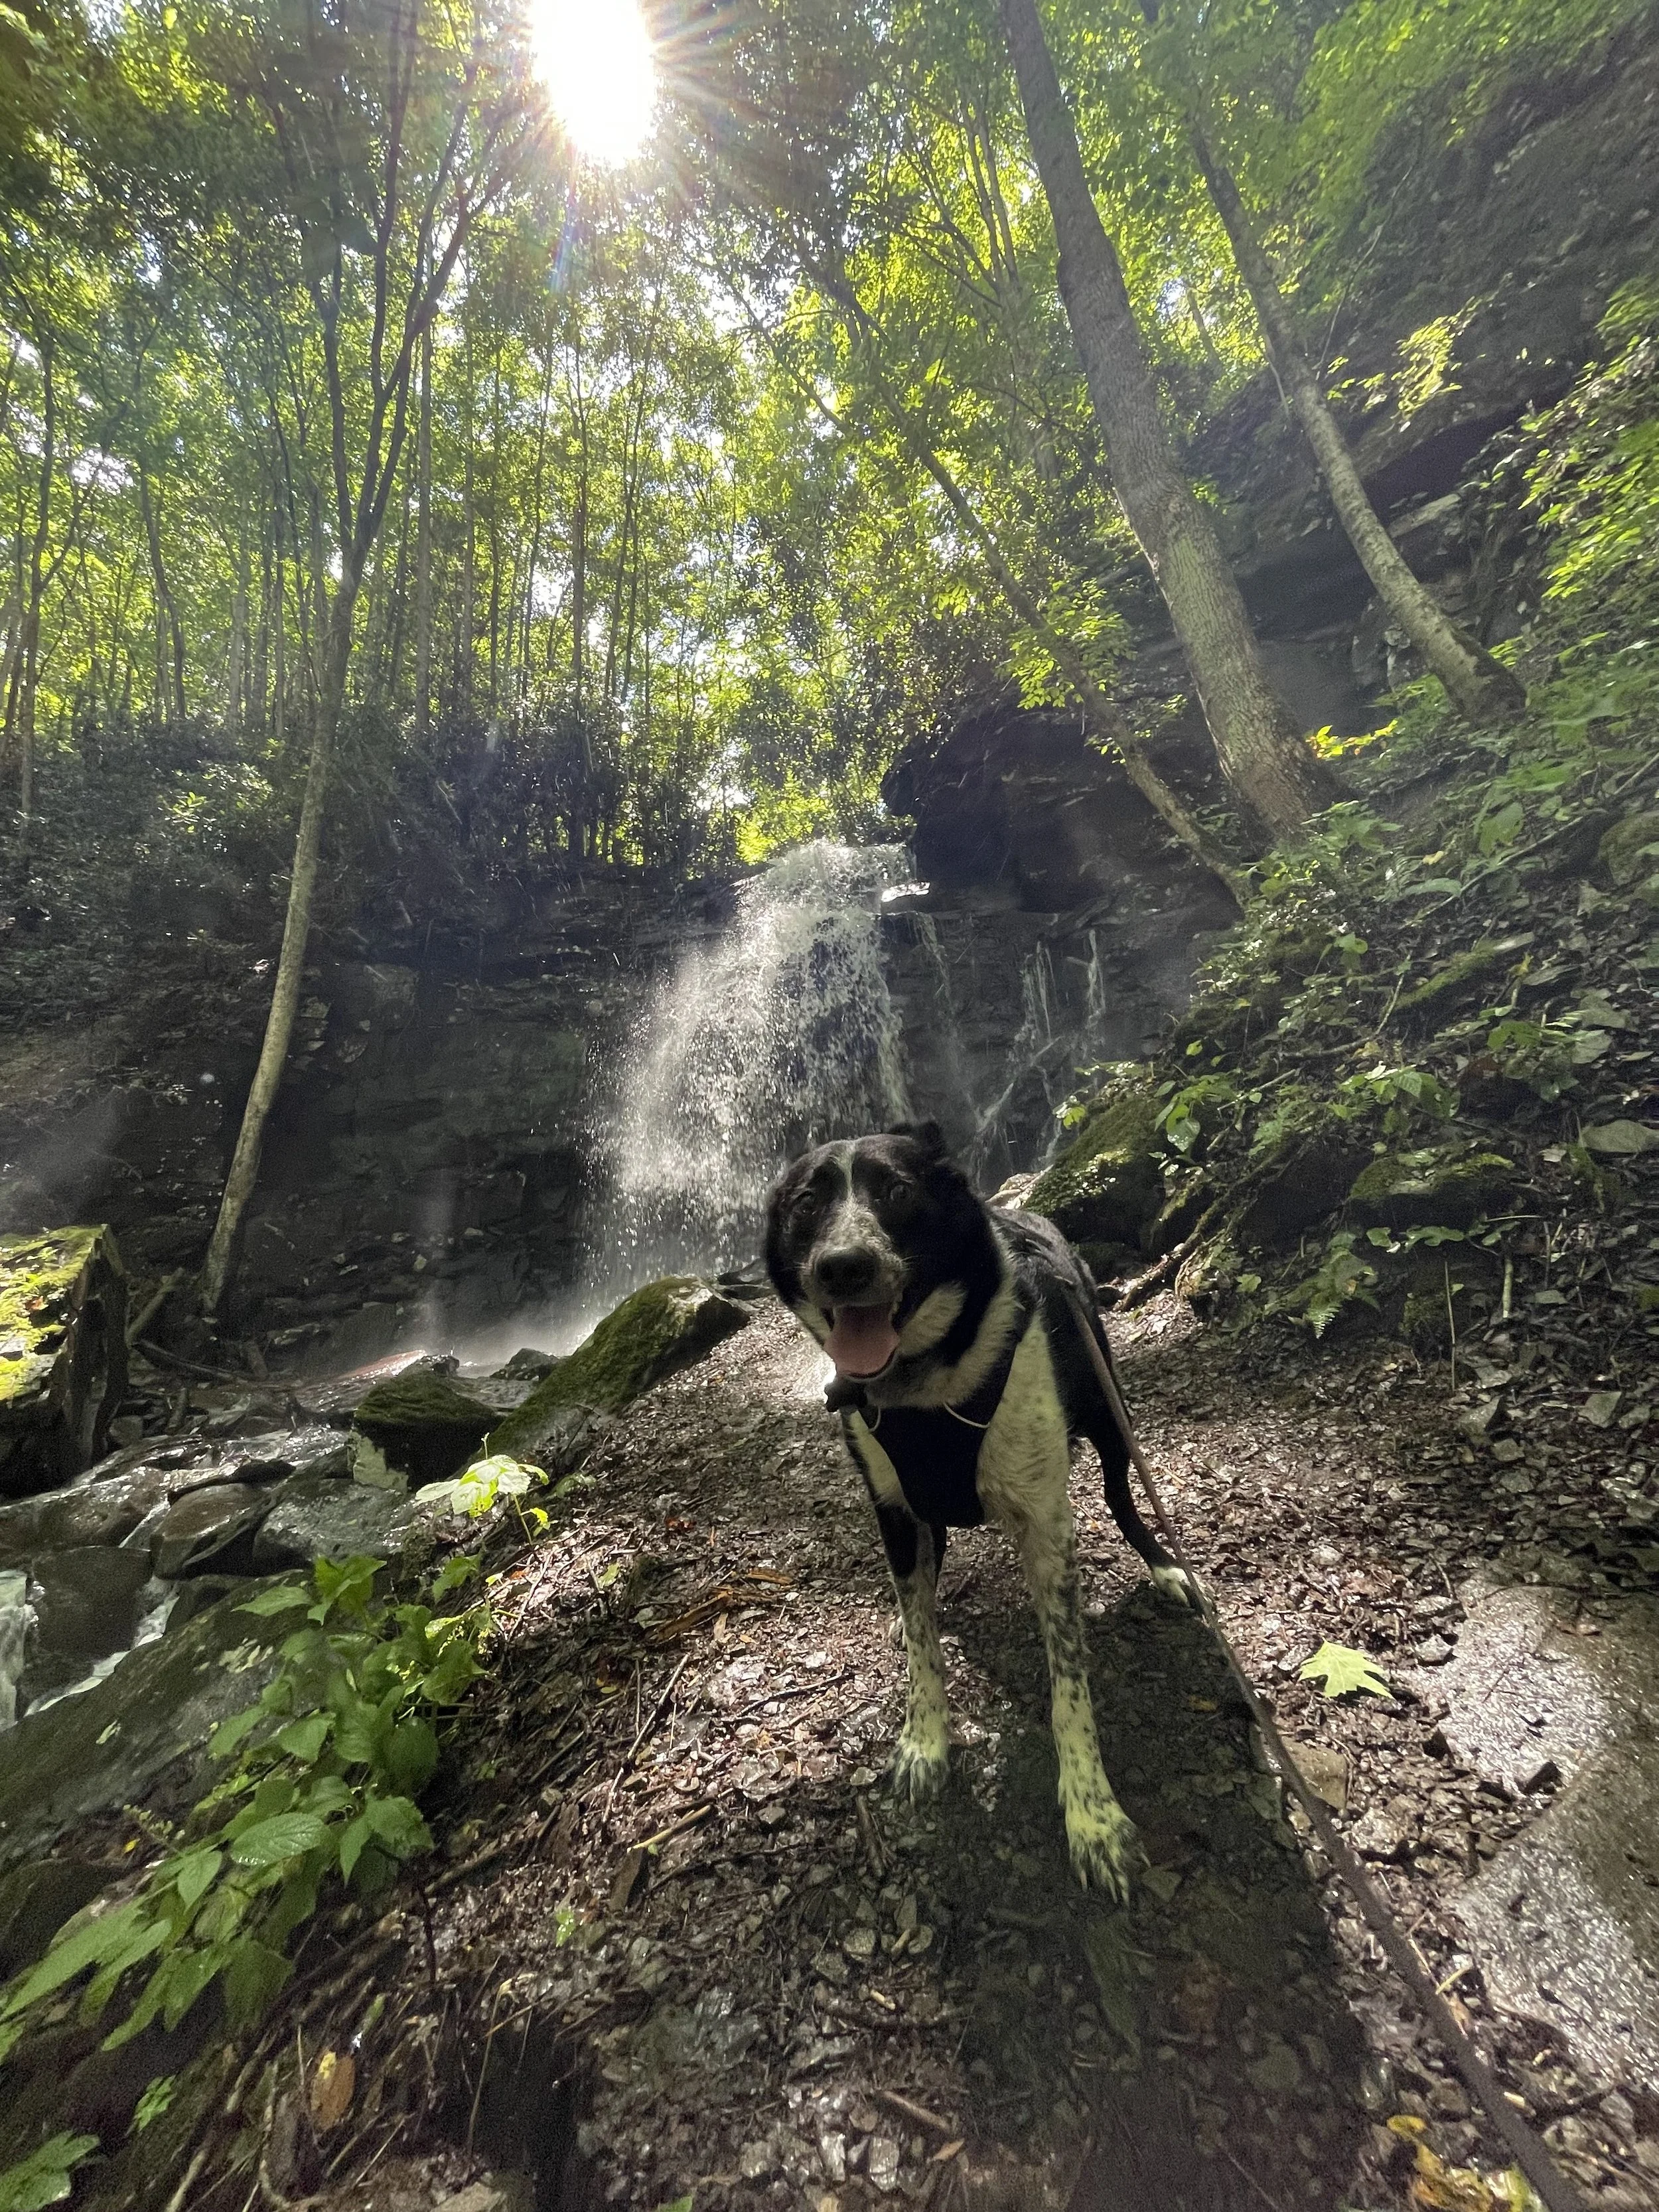
Kates Falls

Paddleboard on Summersville Lake

One of the most beautiful places in New River Gorge National Park is Summersville Lake, which is located about a thirty minute drive from Fayetteville. Here, you’ll find hidden waterfalls, climbers deep water soloing, and one of the best sunsets in the park (from the water of course).

Rent a paddleboard or kayak or bring your own to explore this huge and warm lake in the summers, just make sure that you bring a personal floatation device (PFD) for every passenger on your board or boat.

Be aware that some years, in the fall, the lake does get drained, so make sure you check the park website for updates.

The view from Diamond Point on the Endless Wall Trail

Go Rock Climbing

Other than whitewater rafting, climbing is the most popular sport to do in the New. Rock climbers from all over the world travel here, and many end up staying, because of the beautiful Nuttal Sandstone walls, incredible trad routes, and fun sport climbs. There’s even a good assortment of boulders for anyone who’s not stoked on rope climbing.

If you’ve never climbed before, there are outfitters who can take you on your first climbing trip—gear included! I personally worked for Ace Adventure Resort, but other climbing outfitters include Adventures on the Gorge and Appalachian Mountain Guides.

Another great resource for climbing (other than Mountain Project and the local guide book), is the local climbing shop: Waterstone Outdoors. Every employee here is super knowledgeable and wants to help you get on the rock as soon and as safely as possible.

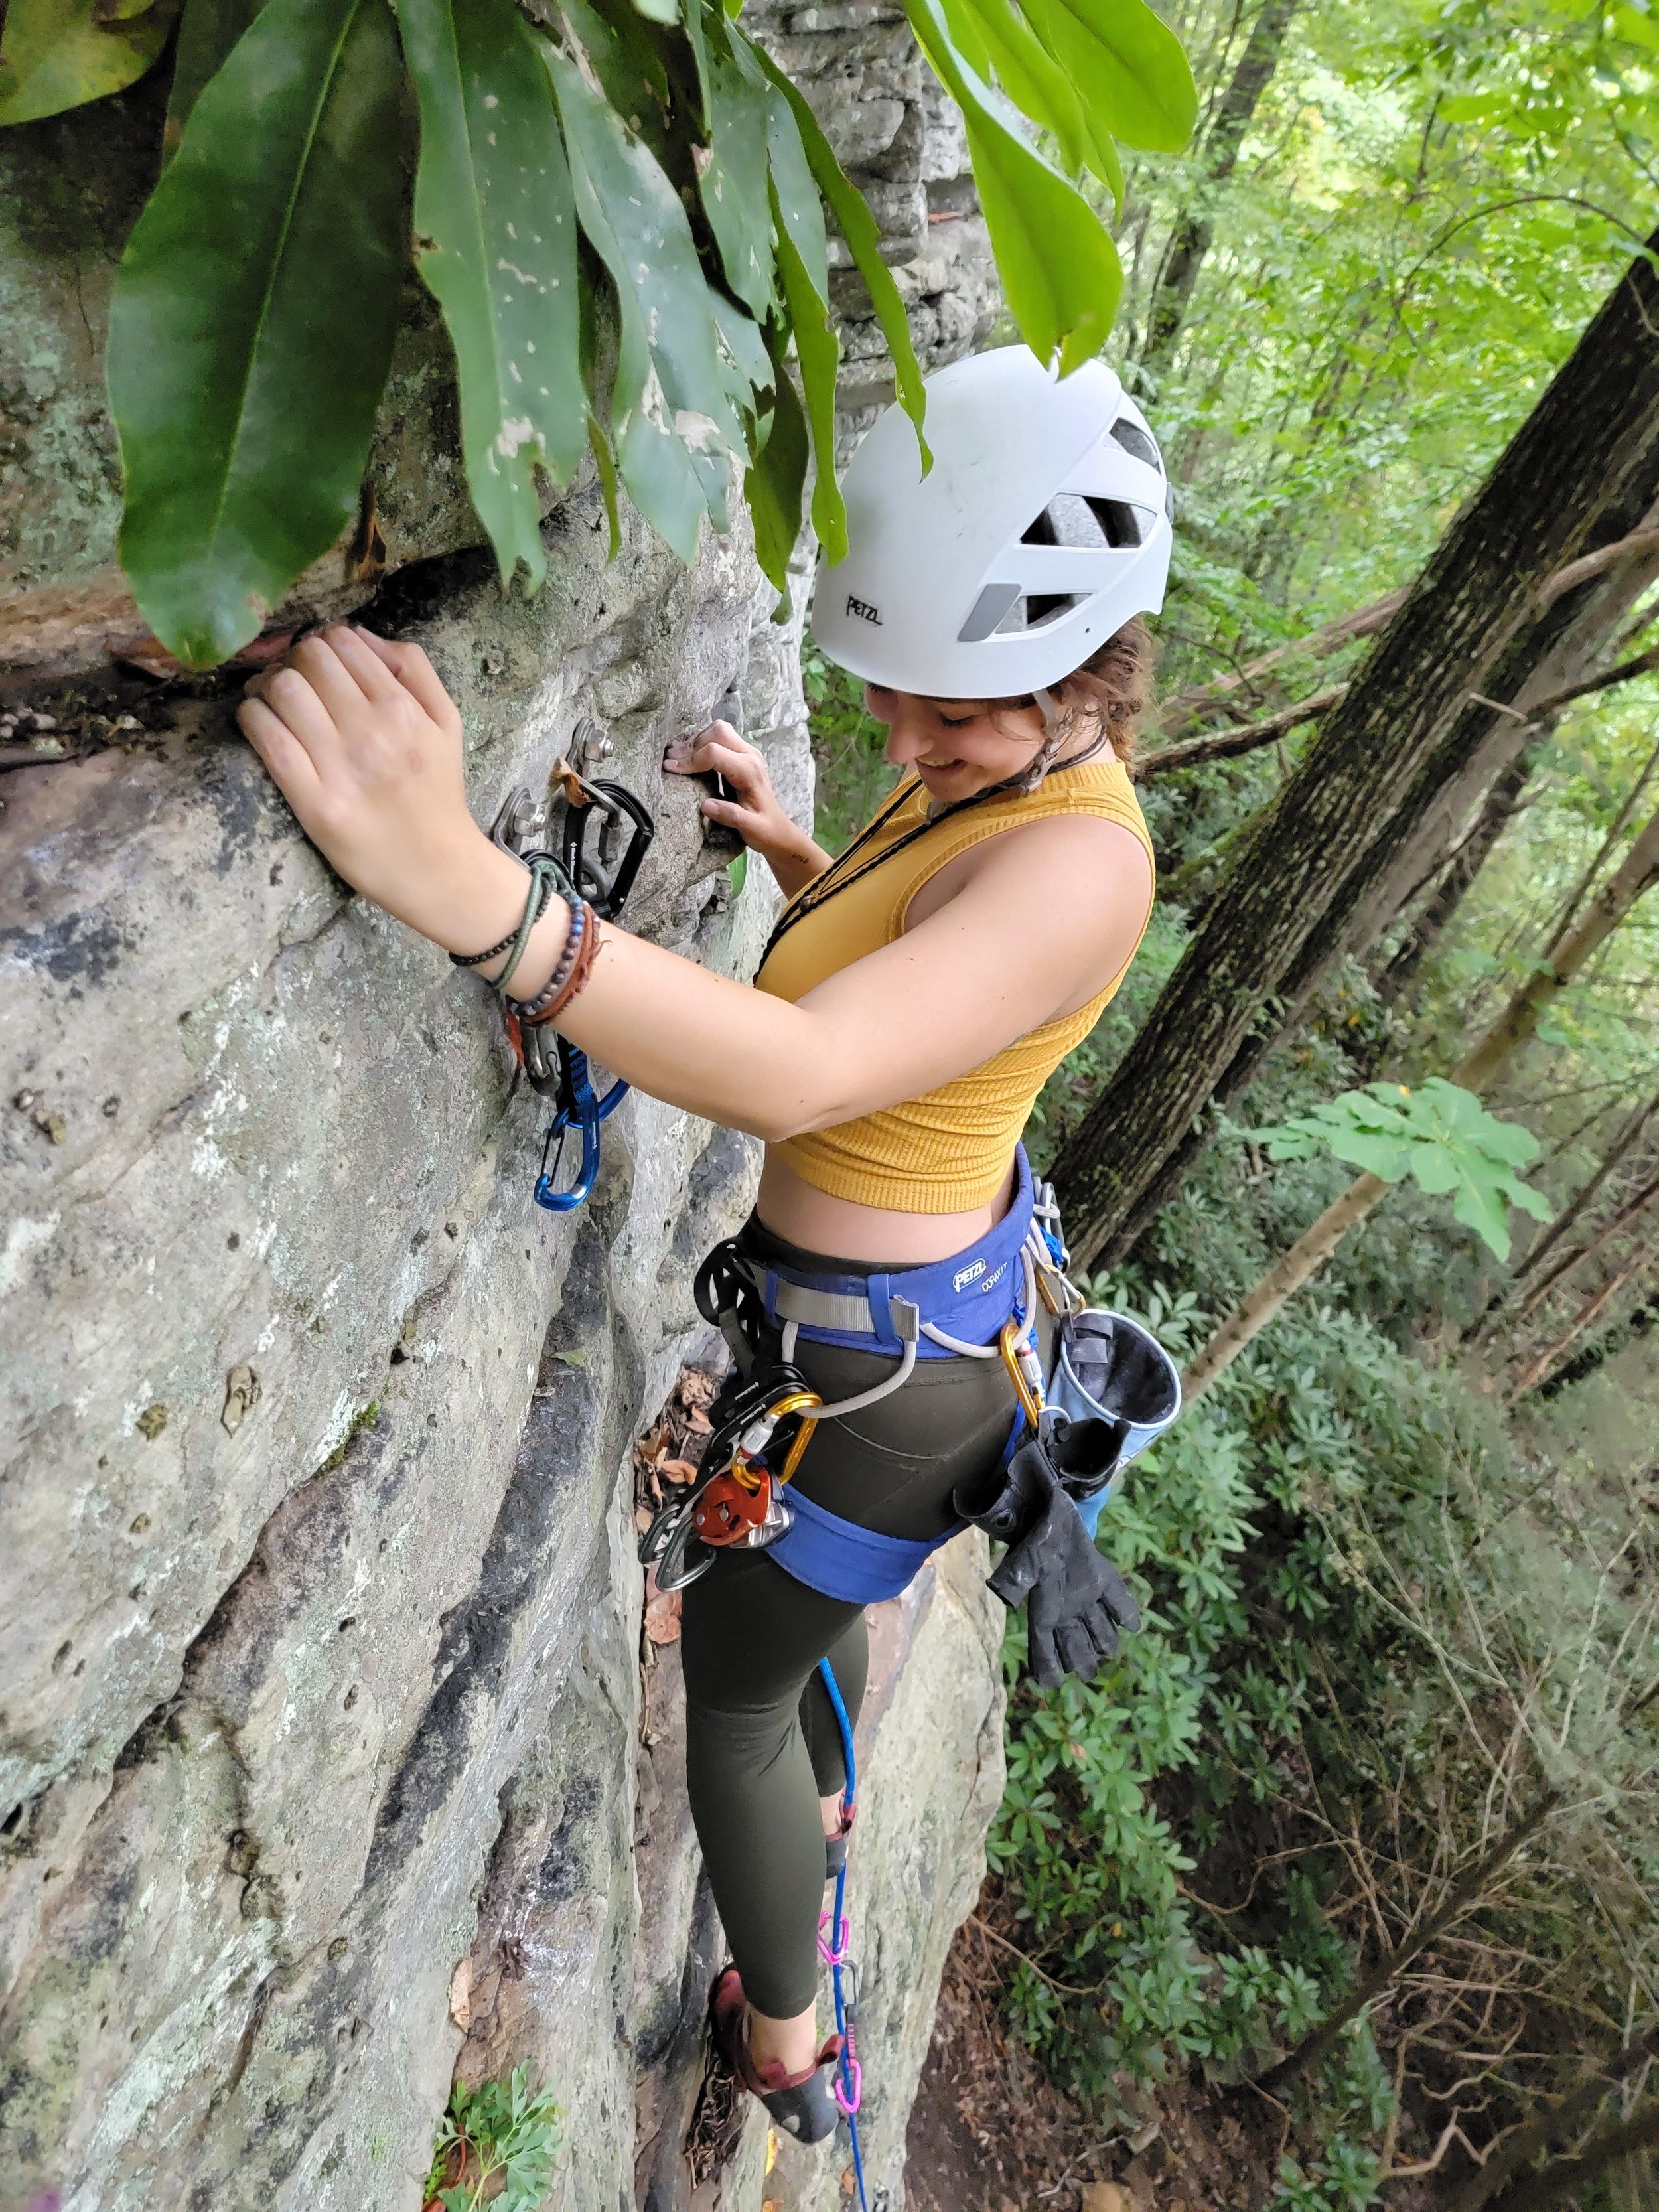
Hal Homel lead climbing in New River Gorge National Park

Explore Fayetteville

There’s a reason Fayetteville is known as the “Coolest Small Town.” Downtown Fayetteville, West Virginia is super cute and has a lot to check out. Other than Waterstone Outdoors, our local climbing shop, there’s a huge assortment of places to visit like the Hobbit Hole, which is the antiques shop, the Great Googly Moogly, which is the local crystal shop, and restaurants like Cathedral Cafe and The Takeout.

Overall, there is so much to see and do in New River Gorge National Park and its surrounding areas, so make the most of it, get out of your comfort zone, and try something NEW.

Your Guide to Visiting National Parks Solo

National Parks are some of the country’s most accessible and abundant nature focused destinations, but for a lot of solo travelers, they’re often intimidating. National Parks seem to be full of unknowns, opportunities to get lost, and no cell service… oh my. But, for many, like myself, National Parks are places of refuge. Personally, National Parks are some of the easiest places to visit as a solo traveler, once you know how to do it.

So, who am I, and why should you listen to my advice about this? My name is Halle, and I’ve been to 51 National Parks, most of them solo, and some more than once. I’ve been solo traveling since March 2019 and traveling full time since June 2019. One of my friends on TikTok even refers to me as the National Park Queen (since I’ve been to so many), this is genuinely my area of expertise.

These are all my tips for navigating and visiting your first National Park… as a solo traveler.

New River Gorge National Park

Go to the Visitor Center

When I first arrive at any National Park, I always make sure to do two things that are going to help my trip tremendously: get a park map, and go to the visitor center to ask a seemingly ridiculous amount of questions.

At most big parks, you’ll be offered a park map when you go through the entrance station, but at smaller parks that may not have an entrance station, you’ll want to grab one of these at the visitor center as well.

Then, I ask all my questions. These include:

I’m only here for one (or two or three) day(s), what should I absolutely make sure I see and do?

How do I get there if I lose cell service?

Where can I walk my dog? (many National Parks do not allow pets on trails)

Where can I refill water?

Where can I camp? / Is the campground full yet?

These questions will help you get your bearings and might lead to other things you need to know as well. Rangers are experts on their park, so don’t be afraid to ask them anything so that you have all the resources you need to have a safe and fulfilling trip.

Indiana Dunes National Park

Know The Basics Ahead of Time

I always visit the National Park Service website before my trip even starts so I have some basic information prior to arriving. The things I’m looking for when I visit the website include the absolute basics and then any information that might affect my plans in the park. It’s important to know these things ahead of time so that you aren’t caught off guard without cell service.

Basic information I want to know is:

-Admission fees and tour fees

-Where my pet can go

-Visitor Center hours

-Expected weather while I’m there

When it comes to information that may affect my plans, I’m usually looking for closures and timed entry regulations. I want to know if there are any roads closed for construction or weather, if there are any trails closed for various reasons that I might have been trying to hike, if there are climbing restrictions, seasonal restrictions due to weather or animal protection, and if admission to the park requires timed entry (like Yosemite and Rocky Mountain). This is also a great time to check if the hike you want to do requires permits (here are my tips for the Angel’s Landing permit system in Zion!) and if there are any environmental concerns you should be aware of (like harmful algal blooms in Zion’s water, which could be toxic if you or your dog drinks from the river).

Kenai Fjords National Park

Take a Hike!

Hiking is one of the best ways to explore a park and it’s a sport you can definitely do solo! Ask a ranger what hikes would be best for your skill level and go explore. Be honest about your hiking experience though, and don’t be afraid to pick up a trail map or only do a shorter trail if you’re new to hiking alone.

New River Gorge National Park

Make Friends

I love meeting people in the places I visit. Making friends is easy when you stay in campgrounds, and oftentimes you’ll be able to connect with someone who might be down to go on an adventure with you. Making friends on your solo travels is part of what makes solo traveling so fun and memorable. So don’t be afraid to go say hi, as long as you feel safe doing so!

Badlands National Park

Stay in Touch with an Emergency Contact

When solo traveling, especially in a place that may not have cell service in it like many National Parks, it’s important to choose an emergency contact to stay in touch with, in case anything happens to you. I often recommend sharing your location with a friend or family member, but also letting them know your plans. Text someone the name of the trail you plan on hiking before you leave cell service, as well as when you expect to return to cell service. Leave them instructions on what they should do if they don’t hear from you in that window of time, so that if you get hurt, they can call for help.

I also do recommend getting certified in Wilderness First Aid if you have the means to. I personally am a Wilderness First Responder and this makes me feel a lot safer and more prepared for longer and more remote trips.

Wind Cave National Park

Get Out of Your Comfort Zone

You’ll see it everywhere on my website: GET OUT OF YOUR COMFORT ZONE!

Do something that scares you just a tiny bit. Whether that’s taking the cave tour, going and making friends, swimming in the alpine lake you hiked to, or simply taking the trip at all, get out of your comfort zone. It’s going to lead to some incredible memories.

Navigating Zion’s New Angel’s Landing Permit System

Zion National Park is one of the most popular National Parks in the National Park System, and Angel’s Landing is one of the most popular trails in the park. Starting on April 1, 2022, hikers are going to be required to have a permit to hike Angel’s Landing, which is an attempt to help increase safety on the trail, as well as promote further conservation efforts of this landscape.

Zion National Park

Angel’s Landing is a hike that requires technical skill to complete, but because of its popularity, many people end up getting injured or worse while attempting this hike. The hike starts off with 27 steep switchbacks for a mile, and then turns into a portion of the trail where you need to use chains that are installed on the sides of the trail so that you can ascend the rest of the way. The chains are there to help you pull yourself up the rock, but also to prevent falling because there are steep drop offs on one and sometimes both sides of the trail. The trail does get extremely congested, and requires groups to take turns ascending and descending the trail as they hike. The entire hike is about 5 miles long, and gains about 1,500 feet in elevation on the ascent.

Understanding the new permit system

This is going to be the first year that Angel’s Landing has a permit requirement for hiking. For this year at least, the National Park Service (NPS) is only going to issue permits via a lottery system, similar to Yosemite’s Half Dome permit system.

Angel's Landing Zion

At the top of Angel’s Landing, surrounded by the usual crowds

You can apply in advance for permits by choosing a few dates you would like to hike Angel’s Landing. You can apply for advance permits via recreation.gov or choose to enter the daily lottery instead.

The Day-before Lottery is similar to the advance lottery, but will only be an application for people trying to do the hike the day after they apply. You have to apply the day before you want to hike, between noon and 3pm Mountain Standard Time.

No matter which lottery you choose to enter to try and score a permit, it does cost $6 to apply for a permit. The good news is, that money goes back to the NPS to keep places like this going!

Angel's Landing hike Zion National Park

Getting on the trail

In the busy season, you will need to take a free shuttle to the Grotto, which is where your trailhead will be. A ranger might check your permit here before you start the trail, or they might check for permits at Scouts Lookout, at the top of the switchbacks.

You can still hike to Scouts Lookout without a permit.

It’s recommended that you have proper gear for this hike. As someone who has summited Angel’s Landing twice, I recommend hiking boots, a backpack (so you can keep your hands free), and a water bladder that holds at least 2 liters of water. In the summers, you’re going to want to carry about 2 liters per person for this hike.

Now, you’re ready to hit the trail! Make sure that you leave no trace, be safe, and have fun!

Learn more at NPS.gov

Why Solo Travel is Essential to Any Healing Journey

When I first started traveling solo in the summer of 2019, I knew I was on the search for something. I didn’t quite know what I’d find, but I knew it wasn’t anything I currently had. What I was looking for, was me. I didn’t quite know it yet because I hadn’t done the digging or the shadow work to identify what was missing, but I knew I was on my way to whatever it was.

Solo travel quickly became an essential part of my own healing journey, and while I took a break from it to travel with someone I loved deeply, I’ve recently found myself at the precipice again: about to step out solo, on the search for something important, but this time, I know what it is.

Solo travel can be transformational. There truly is nothing like spending every waking hour of your days by yourself, outside of your comfort zone. It can bring you back to your very center, and leave you asking yourself, “Why did I do this in the first place?” But the thing is, no matter how hard solo travel is, it can also be incredibly eye opening. So, let’s dive into why solo travel is so essential to your healing journey, and how you can discover yourself on the road.

IMG_8255.jpeg

Solo Travel Forces You to Dig Deep

Let’s just jump right in. Solo travel is intensely transformational for so many reasons, but one of the deepest of all is how much you can learn about yourself in a short amount of time. Travel in any way is meant to put you out of your comfort zone, which leads to a lot of problem solving, whether it’s trying to translate a foreign language in an area with no cell service, or trying to spontaneously find a place to sleep at night. Being alone in the world only adds to this, which forces you to be with yourself during these tough situations. Any triggers that come up as you navigate these problems can highlight healing that you need to address either on your trip, or when you return home.

For example:

“Why does it make me so uncomfortable to stray from my planned itinerary?”

“Can I trust that everything will work out?”

“In what ways can I learn to go with the flow more?”

Solo travel is fantastic at putting you in a place where you can readily receive these questions, and then spend enough time with yourself to find the answer.

Arches1.JPG

Solo Travel Allows for Reinvention

When I was a kid, I always wished that I could start over and completely “reinvent myself.” Really, what I wanted was to end up in a situation where no one knew the old me, which would mean that I could finally be my authentic self safely. Solo travel is the perfect opportunity for you to try on who you really are. So many people travel solo for the purpose of moving past some sort of trauma, be it a breakup, the passing of someone close to them, or a major life change. As you try to find your happiness again, use this as an opportunity to embody the person you truly are. After all, odds are, you’ll never see most of the people you meet while traveling again anyway.

Questions to ask:

“Who am I when I’m home alone? How can I be that person all the time?”

“What is something I’ve always wanted to try?”

BaKaoLam4.jpg

Solo Travel Gets You Out of Your Comfort Zone

I’ve mentioned this a few times already, but traveling solo is the ultimate way to get out of your comfort zone. Your comfort zone keeps you safe. I see it similarly, or attached to, the spiritual ego. It is designed to keep you out of “danger,” but it can also stifle your growth. Growth itself can be uncomfortable, and solo travel pushes you out of your comfort zone in such a way that it forces growth. Things will not always go as planned, and you can either stay in the mentality of controlling your environment (comfort zone), or embrace change, and learn to go with the flow in the most beautiful way.

Things to ponder:

“How can I react differently to this situation?”

“In what ways can I embrace the unknown today?”

Solo Travel Shows You Just How Powerful You Are

A lot of times, when people set out on their healing journey, it’s caused by a feeling of needing to overcome something. Traveling solo forces you to problem solve, it makes it so that you have to be there for yourself when things aren’t quite going your way, and because of that, along your journey, you’ll surely learn exactly how capable and powerful you are. There’s nothing like finishing a really hard hike alone, or figuring out a problem on the road by yourself, or finishing a 3 month road trip that you did solo (believe me, I’d know). Whether you’re accomplishing climbing a mountain, or convincing yourself to go try that new restaurant alone, there is an absolute sense of pride that comes with solo travel and exploration. And, if anything, it’s good to simply be proud of yourself for getting out there any trying, because that is powerful in and of itself.

Ask yourself:

“What did I accomplish that I’m proud of today?”

“How can I overcome this challenge on my own?”

“What would I require from another person if I wasn’t alone in this situation? How can I give that to myself instead?”

Solo travel can push us out of our comfort zones, teach us about our very souls, and show us how extremely powerful we are. It has been a crucial step in so many people’s healing journeys for a reason, so consider making it part of yours. Just be sure to be safe, use your intuition, and have fun. And, remember, it’s okay to ask for help if you need it.

I am going to be offering channeled guidance sessions and card readings on my new section of the site soon: Sunbird Soul, named after my 1985 VW Vanagon that I call Sunbird! If you’re looking for some guidance on your journey, consider signing up for my email list so you know when that goes live!

Looking for tips on how to stay safe traveling solo? Check out this safety post I wrote for all my solo travel tips!

Your Guide to Denali National park

For National Park enthusiasts, Denali is one to check off the bucket list. I recently spent 4 months in the Alaskan Interior, and visited Denali 4 times. Between understanding the park road, wildlife viewing, and the best times to see The Mountain, this is your guide to everything you need to know to visit Denali National Park.

Why Visit Denali?

Denali is known as Alaska’s Yellowstone. It is a vast, incredible, open landscape that is mostly closed to vehicular traffic, making it one of the most pristine wildernesses you can drive to. Because of its untouched wild, it makes for an incredible space for healing, meditation, and being with oneself if you are on a pilgrimage pack to yourself. If you’re simply looking for an incredible place to experience the beauty of Alaska’s nature, there is no shortage of that, either. Denali is home to endless wildlife, the tallest mountain in the US, and incredible backcountry experiences you can’t get anywhere else.

This post was written in 2021, so rules may have changed if visiting in future seasons. For the most part, these systems are the same year to year.

Horseshoe Lake Loop Trail

Horseshoe Lake Loop Trail

When is the best time to go?

There are only two distinct seasons of visitation in Alaska: Summer and Winter. Of course, there are their versions of spring and fall, deemed the Breakup and the Freeze-up, but most people don’t visit during those periods. Denali is open year round, but unless you’re prepared for sub-zero temperatures, and getting around via dogsled, you’ll want to visit in the summer. Summer season in Alaska lasts from around June 1 to September 15. Businesses usually open around May 15, but some roads are still snowy then.

When it comes to visiting Denali, be prepared to become part of the “70% club.” Only 30% of visitors actually see the Mountain, and your best chances are to go in late June or July, and enter the park as early as possible. You’ll want to hop on a bus to Eielson for your best chances of getting a picture like the one below!

Can I drive to Denali?

This is a complicated question because the short answer is, yes, you can drive to the park. Due to protections instated by the National Park Service, though, you can only drive up to Mile 15 of the Park Road. You’ll be able to get to the visitor center, a few established trails, the bus depot, and your furthest point: Savage River. There are very low chances of getting to actually see Mount Denali from this section of the road, so if you don’t have bus reservations, I suggest visiting the local State Park as well, to try to catch a view of it from the North or South Viewpoints.

The Savage Alpine Trail, one of the established trails accessible from the first 15 miles of the Park Road

The Savage Alpine Trail, one of the established trails accessible from the first 15 miles of the Park Road

How does the bus system work?

The bus system is the only way to explore the park past mile 15. You must have a reservation ahead of time, which you can make through Reserve Denali. There are three types of buses you can reserve: Camper Buses, Transit Buses, and Tour Buses. Exceptions to this include buses going to Kantishna Lodge, and standby tickets only available for campers spending 3 nights or more at Teklanika River Campground.

Camper Buses are only for backpackers and campers staying in one of the Park’s many established campgrounds. These buses can take you to a campground, or drop you off in one of the Park’s backpacking regions.

Transit buses can take you through the park, usually as far as the Eielson Visitor Center. In past years, they were able to take you to Wonder Lake, but as of 2021, Wonder lake was only for campers. Transit buses are not required to give you park information, but are a great way to get to see wildlife, and drive through the park.

Tour buses have to give park information as they drive you through the park, but generally stop before Eielson. So if you want to get all the way to the visitor center, I’d suggest booking a Transit bus.

Due to landslides at Polychrome, the park road became inaccessible at the end of the 2021 season until the park finishes construction on this part of the road. The landslides were caused by melting permafrost. Please contact Reserve Denali to check road conditions before booking your bus ticket.

IMG-9439.JPG

What are the best hiking trails?

Denali is mostly a free-hike park, meaning you can go anywhere you want in approved areas, without an established trail. If you choose to do this, make sure you’re confident in your navigation skills, and carry a topographical map of the area you’re going to be hiking.

Always carry bear spray when hiking in Alaska.

The established trails that do exist in Denali are generally short, and many of them are located before Savage River on the park road. In this area, the Savage River and Savage Alpine trails are popular, and the Roadside Trail is the only official dog friendly trail in the park. For a trail close to the park entrance, check out the Horseshoe Lake Trail.

Some of my favorites though, are in the Eielson area, including Thoroughfare Ridge Trail, pictured above.

Looking for more information or local conditions? Check the National Park Service Website!

How to Visit Channel Islands National Park

California is home to 9 stunning National Parks, more than in any other state, including Alaska. 8 of these are accessible by car, but Channel Islands, off the coast of Ventura and Santa Barbara, CA is a little harder to get to. When you visit Channel Islands, you’ll have 5 beautiful islands to choose from, and 2 harbors you can sail out of. This is bound to be an amazing day trip or camping trip, so here is everything you need to know about getting to Channel Islands National Park.

Dogs are not allowed on the islands.

The Ferry

The ferry is the main way people travel to Channel Islands National Park. While you can take private boats out, the official ferry for Channel Islands National Park is Island Packers. They sail out of both Ventura Harbor (which is the larger harbor, and is closer to LA), and Santa Barbara Harbor (which is further from LA). Tickets are $63 per person, round trip for a day trip, and about $80 per person, round trip if you’re planning on camping on the island you choose. On your ferry ride, you’ll likely see animals like dolphins, whales, and sea lions.

IMG_7853.jpeg

The Islands

There are 5 islands you can choose from when visiting Channel Islands National Park. We chose to visit Santa Cruz Island because we went in the winter, only certain islands were accessible. Each island is known for some thing unique. For example, Santa Cruz is known for the endangered island fox and the sea caves!

Anacapa Island is known for the famous Inspiration Point and is also one of the islands that’s more accessible in the winter. Santa Rosa Island is California’s second largest island, and is home to over 100 bird species. San Miguel Island is smaller, and is home to the fossils of prehistoric pygmy mammoths and the caliche forest. Santa Barbara Island is the park’s smallest island, but is home to marine mammals and kelp forests that snorkelers love.

IMG_7816.jpeg

Camping on the Islands

Since you can’t drive to the Islands, the only way to camp on the islands is to backpack. You’ll have to carry all your gear, water, food, and shelter with you. Camping gear must be stowed on the ferry, which you’ll get back once you get to the island. There is a designated campground on the island you choose, and you have to camp there in order to preserve the land elsewhere. Island Packers asks that you book your campsite with the NPS before booking your ferry ticket.

IMG_7858.jpeg

Other Island Activities

There is a lot to do at Channel Islands National Park, but most people who were on our ferry chose to hike or kayak. You can rent kayaks at Ventura Harbor if you don’t own one. We hiked to the Potato Harbor Overlook, but there are other trails you can choose from. Each island has its own hiking guide, and you’ll receive a list of trails and a map when you check into your ferry. Other popular activities on the islands are kayaking, snorkeling, and wildlife photography. Or you can just explore!

IMG_7854.jpeg

Sedona, AZ Bucket List

Sedona, AZ is already a bucket list destination for hikers, photographers, spiritualists, and vanlifers, but what do you do once you get to Sedona? From the crowded trailheads, to the must-see Uptown Sedona, this is everything you need to do and see in Sedona, AZ.

What to know before you go…

The best time of year to visit Sedona, according to the weather, is between October and April, but the best time of year to visit according to the crowds is in the summer. Sedona is located in Northern Arizona, so it gets really hot in the summer, making it almost impossible to hike. In the winter, though, the crowds make it so that you need to choose a hike the night before, and get there first thing in the morning in order to find a parking spot that allows you to actually hike.

Most hikes in Sedona that aren’t affiliated with a state park are dog friendly, so feel free to bring your furry friend along!

On the Soldier’s Pass Trail

On the Soldier’s Pass Trail

Visiting Sedona Vortexes

Sedona is a highly spiritual location full of energy Vortexes. These are natural spaces that are known to be super energetically charged, so much so that spiritual people can feel an energy shift while they are near them. You can recognize them by the swirly “vortex trees,” and they’re often found at the top of hikes like Cathedral Rock and Boynton Canyon.

At the Boynton Canyon Mesa

At the Boynton Canyon Mesa

Hikes You Should Do

Sedona is known for hiking. This is the main thing we do whenever we visit Sedona, and there are so many trails, I definitely haven’t hiked even close to all of them. These are my favorites for first time visitors, though, so that you get the best experience.

Devils Bridge: 4 miles RT, easy-moderate. Devils Bridge takes you to the famous bridge arch formation, where you can get your perfect picture. The trail starts on a 4x4 dirt road, and eventually climbs to the viewpoint. Be careful on the bridge though—it’s narrow!

Devils Bridge Trail

Devils Bridge Trail

Cathedral Rock: 1.2 miles RT, moderate-difficult. Cathedral Rock is a straight ascent of about 700 feet up to a beautiful viewpoint and spiritual vortex. This hike involves some heavy rock scrambling, and I highly recommend going in real hiking boots.

Solider’s Pass Trail and Seven Sacred Pools: as long as you want it to be, easy-moderate. The Seven Sacred Pools are an easy .25 miles from the trailhead, but if you want to go to Soldier’s Pass or the nearby caves, you’ll be doing about a 4 mile hike. We liked returning by walking the 4x4 road to avoid crowds going to the Seven Sacred Pools from Jordan Pond.

The Birthing Cave: 2 miles RT, moderate. This cave trail is easy until it reaches a steep ascent during the last .25 miles to the top. Traditionally, Hopi women came here to give birth, which is part of how it got its name (the other reason being its yonic shape). This is a very busy trail, so be prepared for crowds, and if you want a picture perfect scene for the ‘gram, get there early!

Cathedral Rock Trail

Cathedral Rock Trail

Healthy Hippie Bites

Sedona is a true hippie town full of amazing plant based food. These are my favorite spots for any meal, any time of day.

ChocolaTree: If you’re looking for amazing lunch or dinner food, ChocolaTree has you covered for vegetarian food. With options for any budget and diet, including raw vegan, you’ll love this organic eatery. My favorite thing to order at ChocolaTree is the Mushroom Fantasy.

Local Juicery: If you’re looking for a quick bite for lunch, Local Juicery is an amazing choice. From smoothies and juices, to easy on-the-go meals, this is the place to stop for any food you’re craving. My favorite thing to order here is the Avocado Toast.

Berry Devine: For anyone trying to cool off after a hike, Berry Devine has got you covered. This acai bowl place carries organic acai soft serve perfect for quenching any thirst. My favorite thing to order here is the Vortex Bowl with agave instead of honey and vegan granola.

At a Vortex just after sunrise

At a Vortex just after sunrise

Visit Uptown

Shopping, believe it or not, is another thing you have to do in Sedona. But not just any shopping: crystal shopping. Sedona’s Uptown is their version of downtown, with shops after shops, and restaurants you won’t find anywhere else. Aside from the clothes and art galleries, you’ll find endless metaphysical shops in Uptown, and these are the perfect spots to buy crystals and other spiritual goodies during your trip. My favorite metaphysical shop in Uptown is called the Center For New Age, a shop where the spiritual energy is high, and you’ll find the most genuine crystals in town. They also have affordable incense, a spiritual bookshop, and a vortex at the back of the store.

IMG_7868.jpeg

Sedona, AZ is one of my favorite places in the US, and as a spiritualist, it’s a must see for anyone who connects to the energy of the universe. Even if you’re skeptical, no one can doubt that the hikes here are incredible, and there’s no chance that there is a more beautiful desert town in the Southwest.

Live in a van? Check out last year’s Vanlife Guide to Sedona at the link below!

Your Guide to Yosemite National Park

Yosemite is one of the Big Three National Parks in the US, with Yellowstone and the Grand Canyon being the other two. It’s a top tourist attraction in California, and it’s the site of documentaries such as Free Solo, The Dawn Wall, and Valley Uprising. It’s a rock climber’s paradise, and it’s home to huge rock monoliths such as El Capitan and Half Dome. It’s a destination that’s on nearly everyone’s bucket list, but if you’ve never been, it’s quite an overwhelming park to plan a trip to. This is your complete guide, to help you plan your Yosemite camping trip, vacation, or something in between.

IMG_3073.jpg

The Basics

Yosemite is located in Northern California, and is closest to Sacramento. It spans over 1,200 square miles. It’s most easily accessible from the west entrance. The east entrance through Tioga Pass closes for snow between November and May/June. It costs $35 to enter per car, or the use of an America the Beautiful Pass. You will need a car to get from the entrance station into the Valley, but in a normal operation year, there is a shuttle you can take around the park. Overall, pets are not allowed on trails, but please check NPS.gov/yose/planyourvisit/pets for more information on where your dog can accompany you so that you can make the decision of whether you want to bring your dog with you to the park.

IMG_2542.jpg

What time of year should I visit?

Yosemite is known for its waterfalls (Yosemite falls is the tallest waterfall in the lower 48), so if your goal is the see the falls, spring is going to be your best bet, after the snowmelt. But, that’s not to say that other times of the year aren’t amazing times to visit. Winter is ideal for avoiding crowds, but the park does get super snowy. Winter is also the only time of year you can see the annual Fire Fall at Horsetail Falls (February). Summer will be the warmest but also the most crowded season, however, it’s not too late to see the waterfalls this time of year. In the Fall, the waterfalls are mostly dried up, but this is the only time of year that you can see the trees changing colors, which is a unique sight to see in this park.

IMG_3057.jpg

Where should I stay?

If your goal is to stay in the park, you’ll have quite a few choices. If you want to camp in the park, I suggest making reservations on Recreation.gov as soon as you start planning your trip. Upper Pines is my favorite reservable campground in the park, but any of them will do. If you can’t get a camping reservation, I love the community at the walk up campground Camp 4. This is the famous climber’s camp, and it’s only $6 per person.

If you’re not super into camping, there are quite a few lodging options within the park. The Ahwahnee, the Yosemite Valley Lodge, and the Wawona Hotel are three hotel options within the park. If you want a glamping experience, Housekeeping Camp or Curry Village are great options.

If you can’t get a spot in the park, there are plenty of hotels and even a hostel in the nearby town of Oakhurst.

IMG_2541.jpg

What should I not miss?

When people ask me this question about Yosemite, I have a list of my go-to spots for first time travelers. If you’re entering the park from the west side, make sure you make a stop at Glacier Point on your way either in or out of the park. Once you’re in the Valley, make sure you see Lower Yosemite Falls, and if you’re a hiker, hiker to Upper Yosemite Falls. If you visit in the Spring or Summer, make sure you go see Mirror Lake. Seeing the giant Sequoias in the Mariposa Grove is a must-see for anyone who’s new to the Sierra Range. For hikers, Vernal and Nevada Falls are a great combo of hiking destinations to fill a day with. Of course there is so much to see in the park, but if you can’t fit anything else, make sure you catch the sunset over Half Dome one night.

IMG_3110.jpg

Anything else?

Yosemite is home to tons of wildlife, so to keep them and you safe, make sure that you use bear boxes whenever camping, and try not to leave food in your car. Yosemite bears are smart and can break into vehicles. Bear spray is not necessary in the park, unless it makes you feel better, since there are no grizzlies in Yosemite, but they do want your food, so make sure you don’t sleep with anything in your tent that smells like food.

Also, remember that no national park is an amusement park, so you’re responsible for your safety on the trail, your food, and to keep your area clean of all trash. Wear proper footwear when on the trail, and bring water, even if it’s cold outside.

The Vanlife Guide to Hitting the Road

It’s finally 2021, and with so many people hitting the road in their quarantine-built vans this winter, I thought it was about time I gave you all my ultimate tips for beginner vanlifers from someone who’s been on the road for almost 2 years. I started my vanlife journey in June of 2019 and have since been to 48 states and over 40 National Parks. I’ve camped in official campgrounds, Walmart parking lots, rest stops, and on BLM land. And I’ve showered at State Parks, with baby wipes, and outside. These are my favorite tips for beginner vanlifers so that you can hit the road easily this year.

AlabamaHills3.JPG

Buy a National Parks Annual Pass

My best investment when I hit the road in 2019 was my America the Beautiful Pass. I’m now on my third annual pass, and I could not be more grateful for it and the money it’s saved me. When you’re traveling, especially if you’re in the US, you’re likely going to be hitting a lot of public lands, which includes National Parks. In the US, the average National Park costs $30 USD to enter. If you add up how much it would’ve costed me to pay the entrance fee at each of the 42 parks I’ve visited in my life, that would be over $1,200 USD. Purchasing three America the Beautiful Passes over the past few years at $80 each adds up to only $240 USD. While some parks, especially on the east coast are free to enter, there are over 400 National Park Service sites in the country, and having an annual pass is going to save you a ton of money. If you’re going to be traveling in Canada, check out their annual pass system as well.

My dog, Lassen, at my 42nd National Park, White Sands in New Mexico

My dog, Lassen, at my 42nd National Park, White Sands in New Mexico

Know That You Can Camp For Free

While I’ve done my fair share of paid camping, specifically while I was solo, there is a secret that many people don’t know about, and that’s free camping or boondocking. Of course, there are places you can park overnight for free such as rest stops (in some states) and Walmart parking lots, but if you want to experience the photogenic vanlife you’ve probably been dreaming of, you’ll want to look for National Forest and BLM (Bureau of Land Management) Land. Both of these types of public land allow dispersed camping on their dirt roads, which means your backyard for the night can be the woods, the desert, or the mountains!

A National Forest Spot I lived on for 2 weeks in 2020

A National Forest Spot I lived on for 2 weeks in 2020

Invest in a Solar Shower

So many people ask how you shower on the road, especially now that gyms are closed. When I used to pay for camping, I would often find myself at campgrounds that had showers or the option to pay for one. Now that the majority of my camping is done for free, showers are more few and far between. Solar Showers are a super basic concept that involves a black bag to hold water, and a hose that works with gravity. If it’s warm out, you can simply fill the bag with water and sit it in the sun for a few hours and it heats the water for you. If it’s cold, we’ll often boil half our water first. We got ours for about $15 at Walmart. Showering outside is incredibly liberating, and if you need a little more privacy, Wolfwise makes portable shower tents as well.

AnzaBorrego4.JPG

Download Your Google Maps

If you think you might be losing cell service while you drive anywhere, make sure you download your Google Maps to work offline. This means you’ll be able to get around safely, even without a signal. This has come in handy so many times, especially in Montana near Glacier National Park, and Washington, near Mount Adams.

There’s No Right Way to Vanlife

There’s this weird stigma I’ve realized is present in a lot of vanlife Facebook groups, and that is that there is a right way to do vanlife. The thing is, we’re all individuals on very individual journeys and what might work for one person might not for another. Don’t let anyone you meet influence your adventure. This is your journey, make it yours.

Badlands11.JPG

Products I’ve Loved During My Life on the Road (not sponsored)

  • Doctor Bronner’s Castille Soap

  • Outdoor “Mexican” blanket like the one in the above picture. You can find these at souvenir shops, and sometimes gas stations.

  • A wide brimmed hat like the one I’m wearing above

  • Tevas or some other type of trekking sandal

Top 5 Most Dog Friendly National Parks

We love traveling with our furry friends, but as a lot of people who like to travel in the US know, most National Parks aren’t super dog friendly. There are a few we’ve found since traveling with our border collie, Lassen, that we’ve loved due to the dog friendly trails. It’s made it easier to travel with him, and we all have so much fun getting to see the sights! These are our top 5 dog friendly National Parks.

Don’t miss the BARK Ranger program at many of these parks—a goal to educate dog owners on where their dogs can and can’t go in the park. Parks with BARK Ranger programs are specified below.

CityOfRocks2.JPG

Great Sand Dunes, CO

If you’ve been following a while, you’ll know that we loved Great Sand Dunes National Park. This is a fairly large park, and the whole main area of the sand dunes is completely dog friendly. Your dog has to be on a leash, but we don’t mind! Lassen was able to climb to the top of High Dune with us and run with us down the sides of the dunes. We loved how dog friendly this park was, and so did Lassen!

IMG-6428.JPG

White Sands, NM

White Sands National Park, NM is very similar to Great Sand Dunes. Dogs are allowed all over the dunes as long as they’re on a leash, which made this the perfect sunrise park for us. We love being able to take Lassen along on adventures, so it was great to not have to leave him in the car to experience the park. White Sands is also part of the BARK Ranger program.

IMG_1043.jpg

Petrified Forest, AZ

While Petrified Forest is a small park, and one of the least visited, it’s also one of the most dog friendly. Lassen was able to come everywhere with us. Most of the trails in this park are paved, so as long as your dog is on a leash and stays with you on the trail, they’re allowed to accompany you throughout your entire trip through the park. Petrified Forest also has a BARK Ranger program where you can get a free treat for your dog.

IMG-7608.jpg

Olympic, WA

Olympic was actually the park that coined the BARK Ranger program! Olympic is a huge park, and while not all of it is dog friendly, many of the beaches are! This was where Lassen first saw the ocean. Our favorite beaches to take our dog to were Rialto and Ruby Beach. Your dog is also allowed around Crescent Lake and on the Spruce Railroad Trail.

Olympic10.JPG

Black Canyon of the Gunnison, CO

While your dog can’t hike down into the canyon with you, this is the perfect National Park to take your dog to if you’re a sight-seeing type of traveler. Dogs are allowed to join you at all of the park lookouts, even the ones that are unpaved. Lassen and I had a great time driving to each viewpoint while Jared did a bigger hike into the canyon.

It’s unfortunately very hard to get a picture of a dog with a canyon you have to get very close to the railings of to see. But I promise he loved it!

It’s unfortunately very hard to get a picture of a dog with a canyon you have to get very close to the railings of to see. But I promise he loved it!

Honorable Mentions:

City of Rocks National Reserve, ID

Pictured Rocks National Lakeshore, MI

Agate Fossil Beds National Monument, NE